Creating Scheduled Flows The Easy Way: Using Formula Checkboxes as Triggers
August 24, 2020
Scheduled flows are a great way to run actions on batches of records at a specific time. This is useful for large bulk updates, as flows can be scheduled during off hours to minimize any potential conflicts.
Salesforce Flow Use Cases
● Updating lead status when a lead hasn’t been touched in over a week.
● Creating batches of records to action at one time, like following up with all customers who completed onboarding last week.
The Problem - Scheduled flows aren't perfect...
Scheduled flows have one big limitation: they do not allow the “OR” operator to be used in the criteria that triggers the flow.
One workaround is to create multiple scheduled flows, each containing different criteria, but having multiple flows doing the same thing is a messy solution and can increase the chances of running into a "CPU limit exceeded" error.
The Solution
Instead, users can build all of their criteria into a formula checkbox on the object, and then use this as criteria for the scheduled flow.
Here, we discuss how to move a Lead into the unqualified status if it has gone more than 7 days without any activities or without a status change.
First, new fields will be needed to capture the date of the Lead’s last status change and the criteria used to trigger the flow.
Create a new Lead field with a data type of Date. This field will be populated using process builder. We labeled ours “Last Status Change”.

Next, head over to process builder and create one for the Lead object, or edit an existing Lead process.
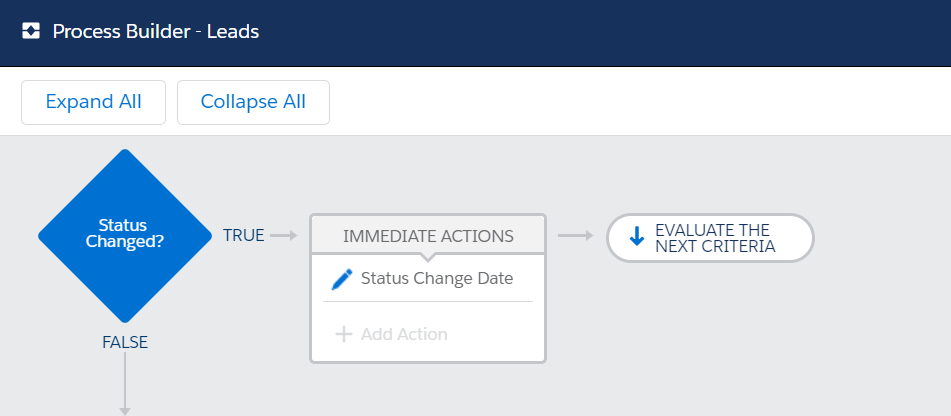
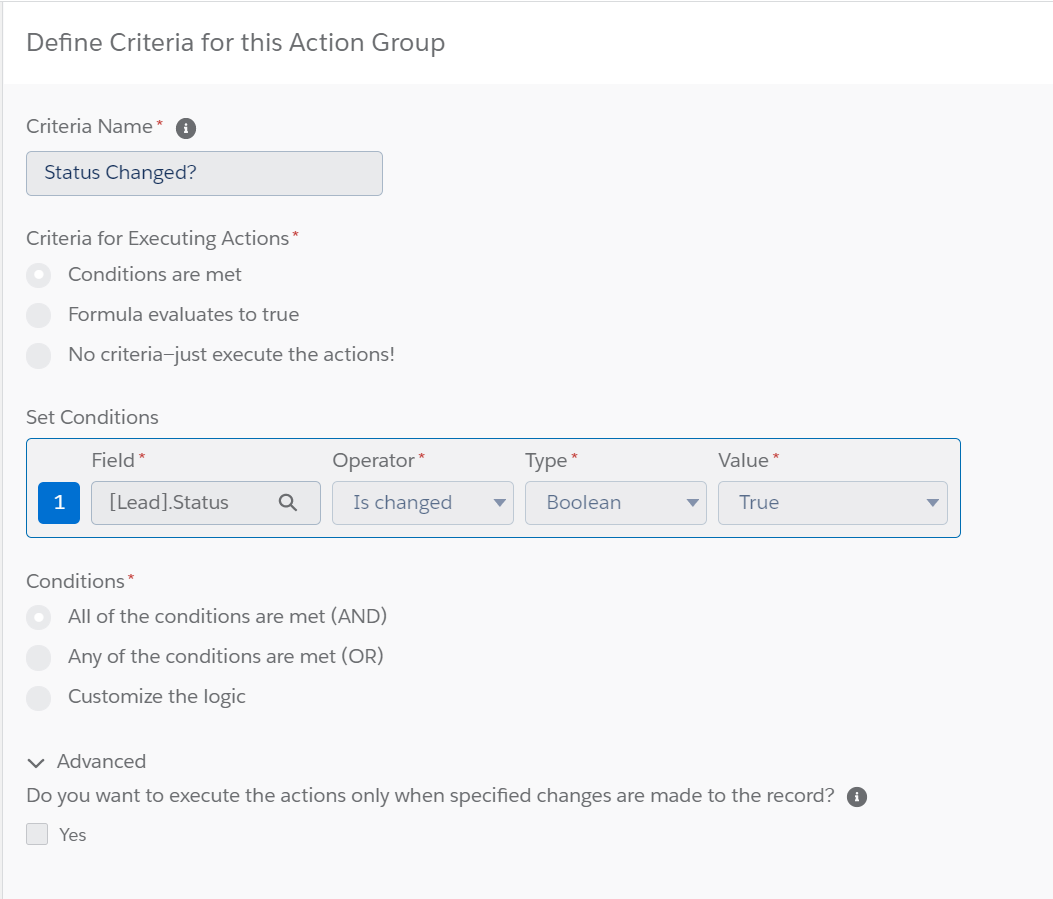
For the criteria, select the Status field, the “Is Changed” operator (to ensure the action runs only for Lead Status changes), and a Value of True.
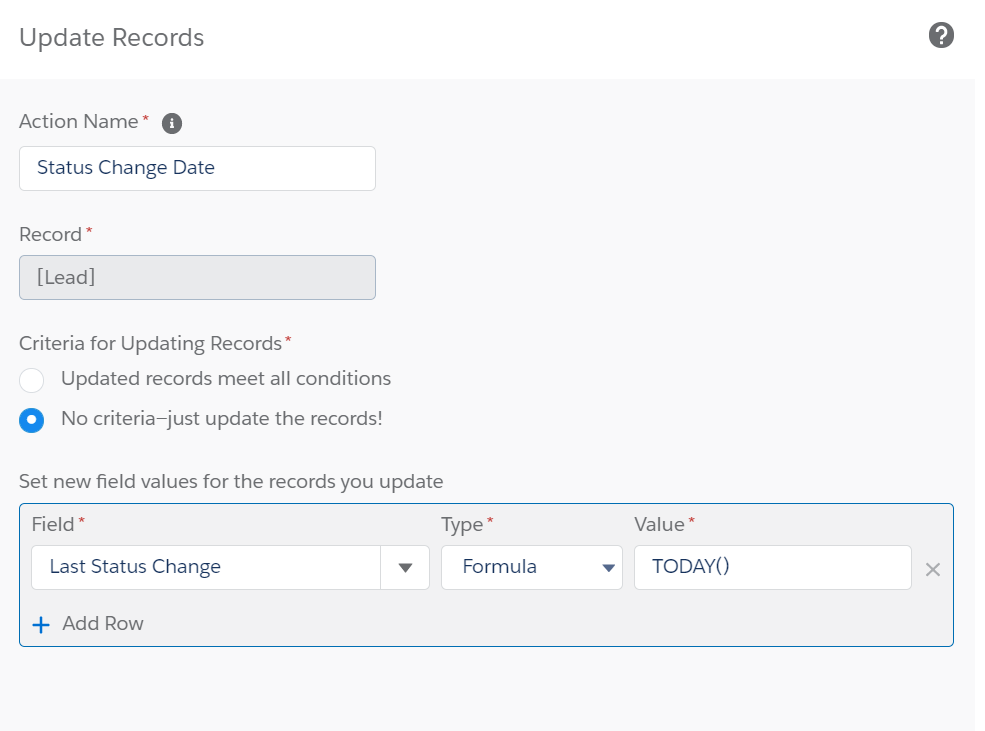
Update Records
For the update action, select the date field you want to populate when the Lead Status changes. For the Type, choose Formula. Enter the TODAY() function into the formula editor.
Now save the action and activate your process builder.
Next, create one more Lead field with a data type of Formula and a return type of Checkbox. This field will evaluate your criteria to determine if the scheduled flow should run on a record.
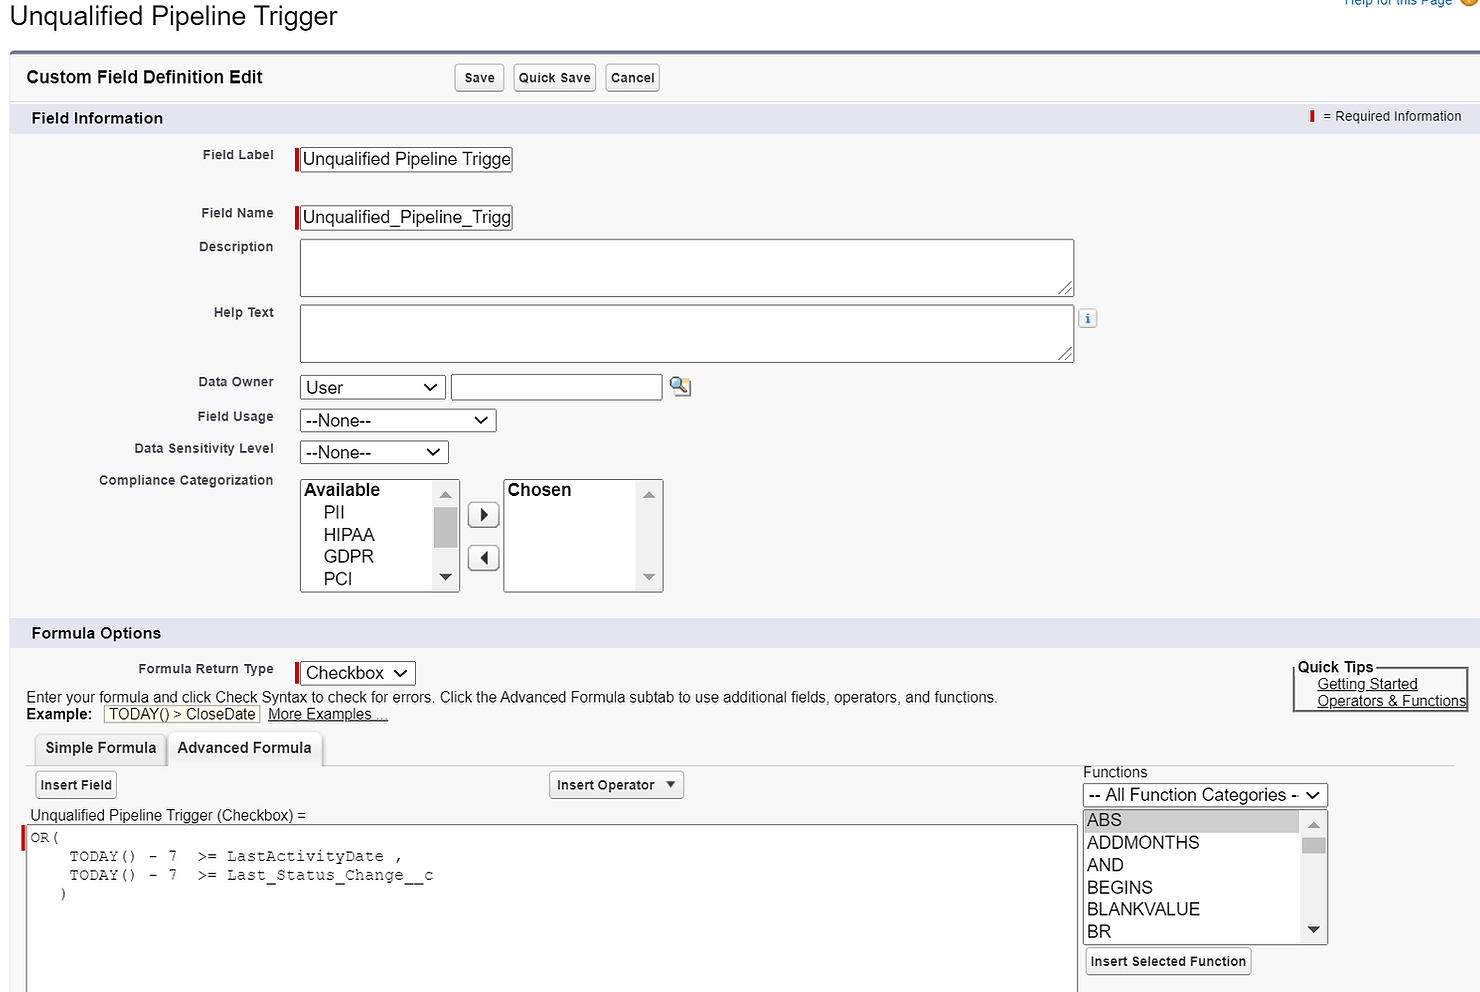
Here, we use the below formula to check whether the Last Status Change date or the Last Activity Date was more than 7 days ago. We labeled this field “Unqualified Pipeline Trigger”.
OR(
TODAY() - 7 >= LastActivityDate ,
TODAY() - 7 >= Last_Status_Change__c
)
As a side note, the Last Activity Date, as shown in the formula, is a Standard Salesforce field that is not exposed by default and therefore won't be on the page layout.
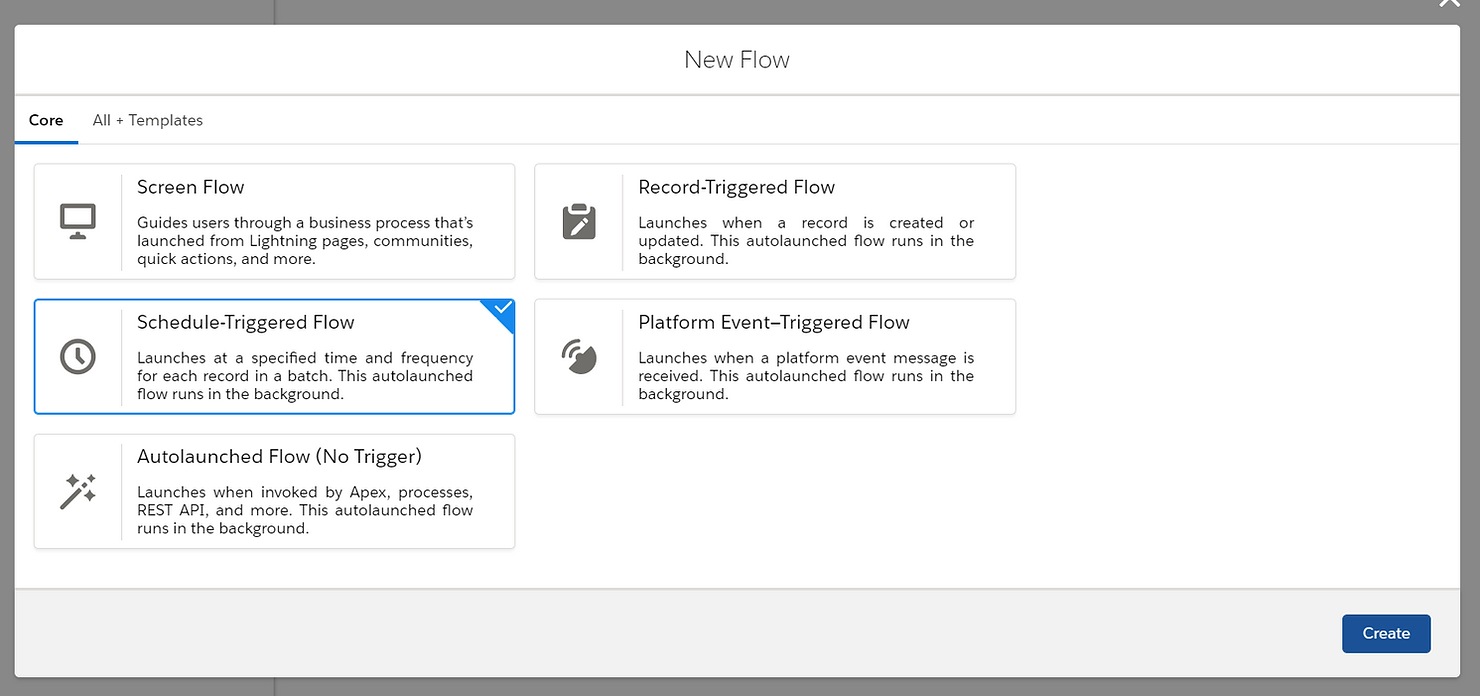
Finally, you are ready to create your scheduled flow. Go to the Flows section in Setup and click “New Flow”’.
Select Schedule-Triggered Flow
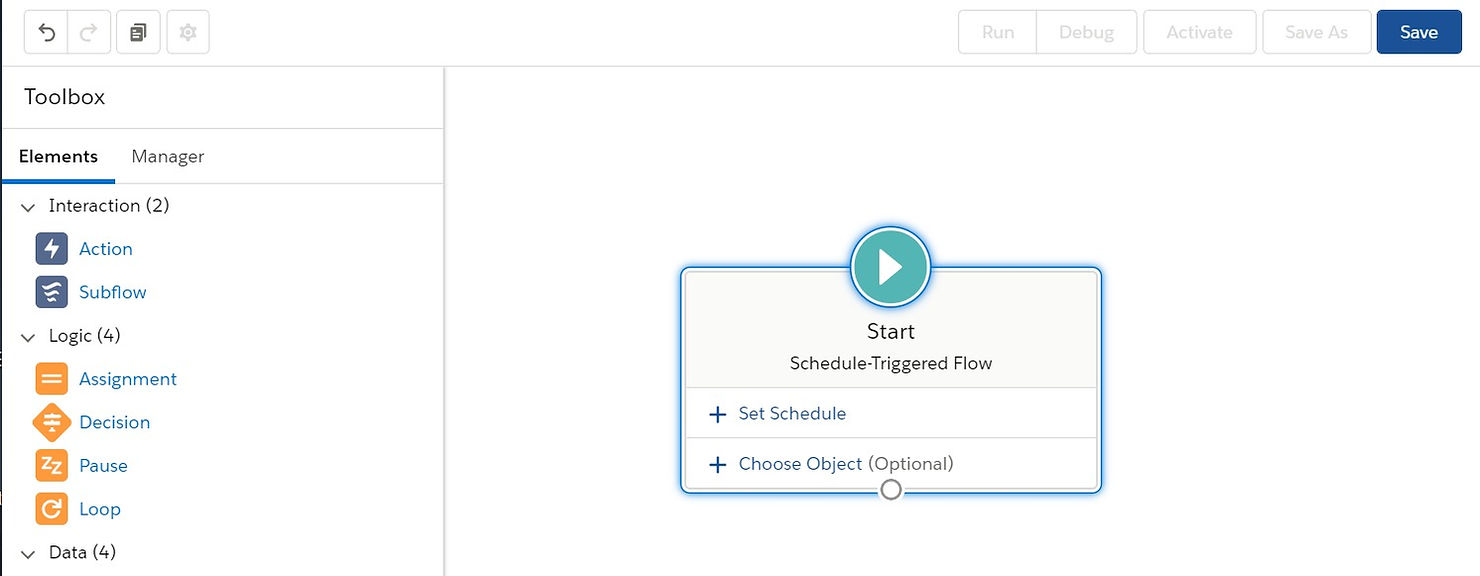
The flow canvas will open to a lonely “Start” element.
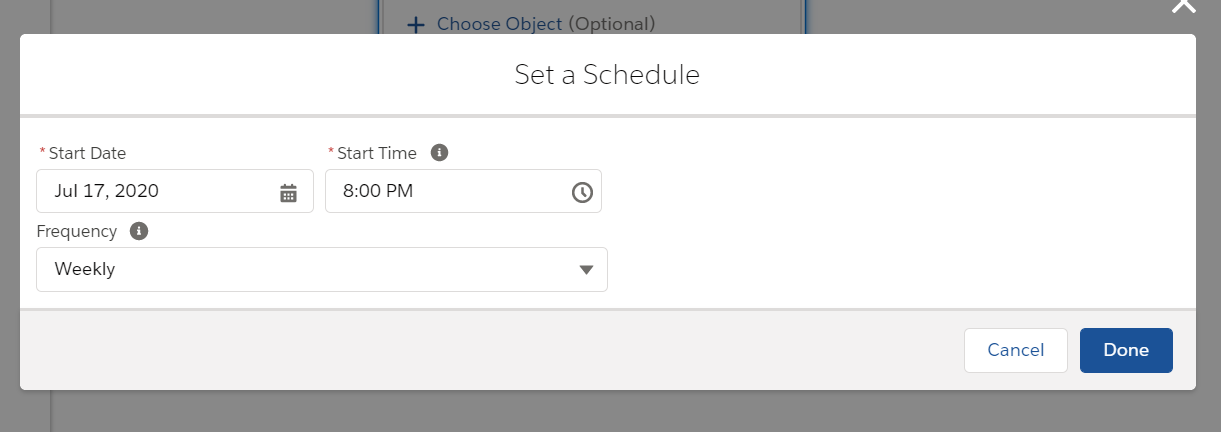
Click on “Set Schedule” to input the date and frequency that your flow should run. Here, we are setting our flow to start on Friday July 17 at 8:00PM with a weekly frequency. This ensures that the flow runs the updates when not many Users are expected to be online. Note that the Start Time for the flow is based on the Salesforce Org’s timezone and not your User default timezone. Be sure to take this into account when scheduling the flow.
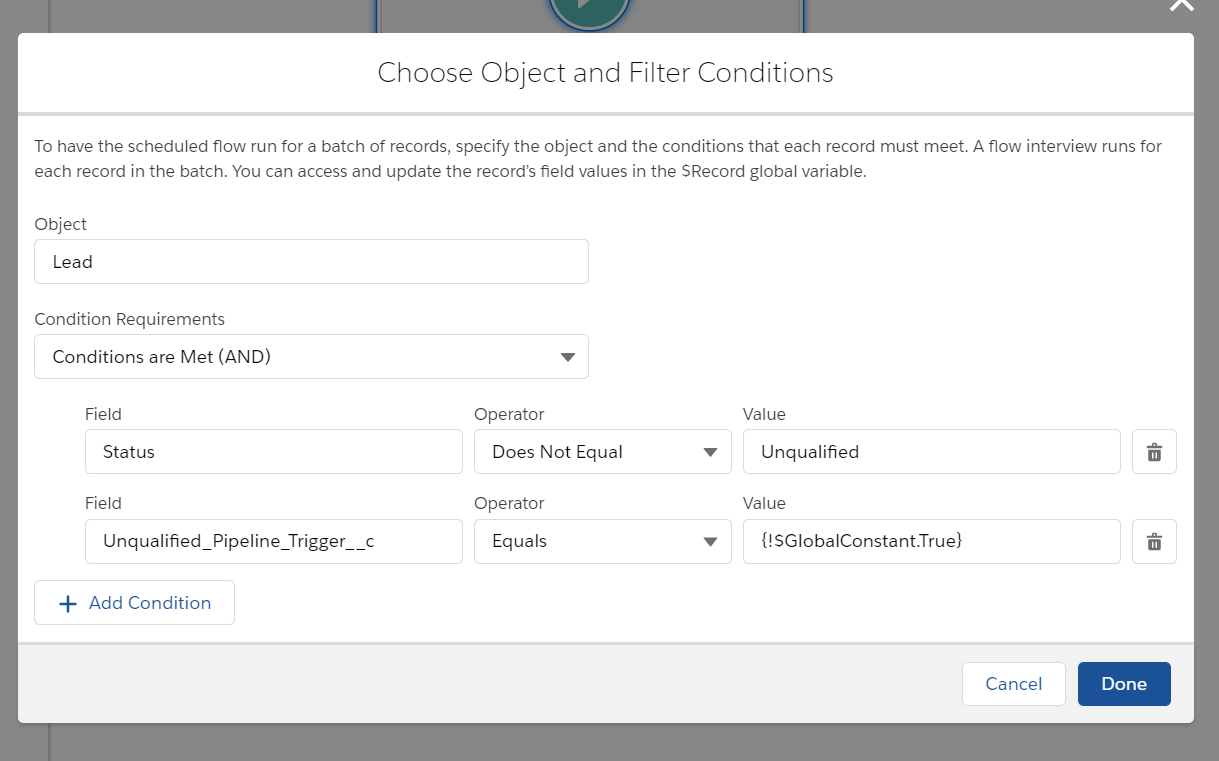
Click Done, then click “Choose an Object”. Enter Lead as the object, then the section to enter your criteria will display. Notice here that under the Condition Requirements, the scheduled flow can only be run with “AND” criteria, or no criteria at all. This is where the formula checkbox shines.
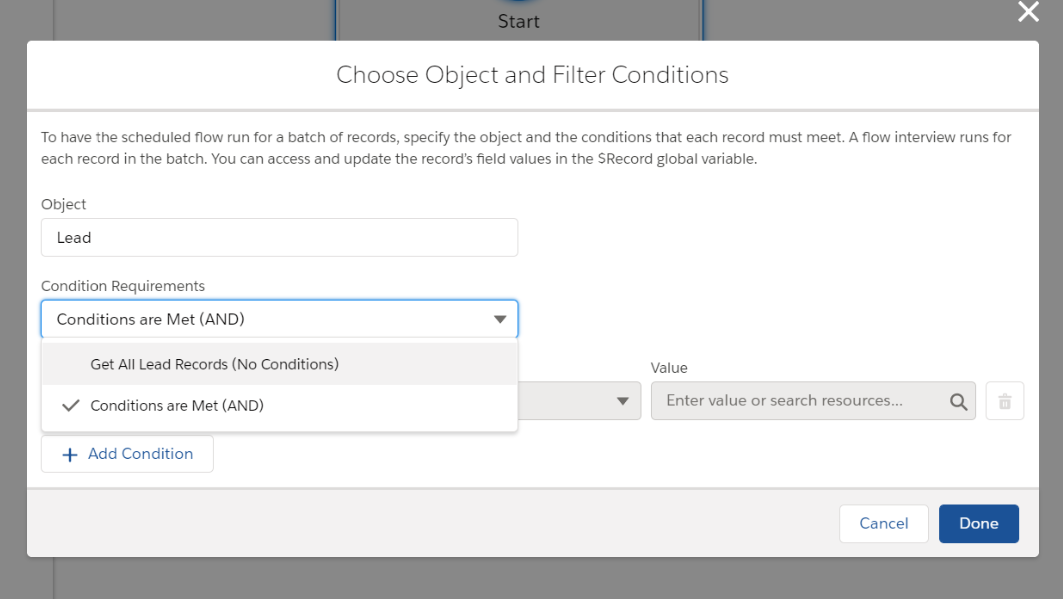
Select the “AND” Condition Requirement and then enter the fields and criteria. Here, the first of our criteria checks that the Lead’s Status field is not already set to Unqualified. This ensures that the flow does not run unnecessarily on Leads who are already Unqualified. Next, the Unqualified Pipeline Trigger formula field is evaluated to see if it is checked, or True.
Important Salesforce Automation Note:
Is it important to remember that, as with other Salesforce automations and triggers, a flow cannot be triggered by a formula field alone. This is due to formula fields operating as “run-time”’ fields and therefore are not actually saved to the Salesforce database. You must make sure that a non-formula field is used along with the formula field in the flow criteria.
If you have no other fields to use as criteria, you can use the Lead’s “Last Name” field and have the criteria check that the “Is Null” operator evaluates to False. Since the Last Name field is required on the Lead, and therefore can never be null, your flow will always trigger without issue.
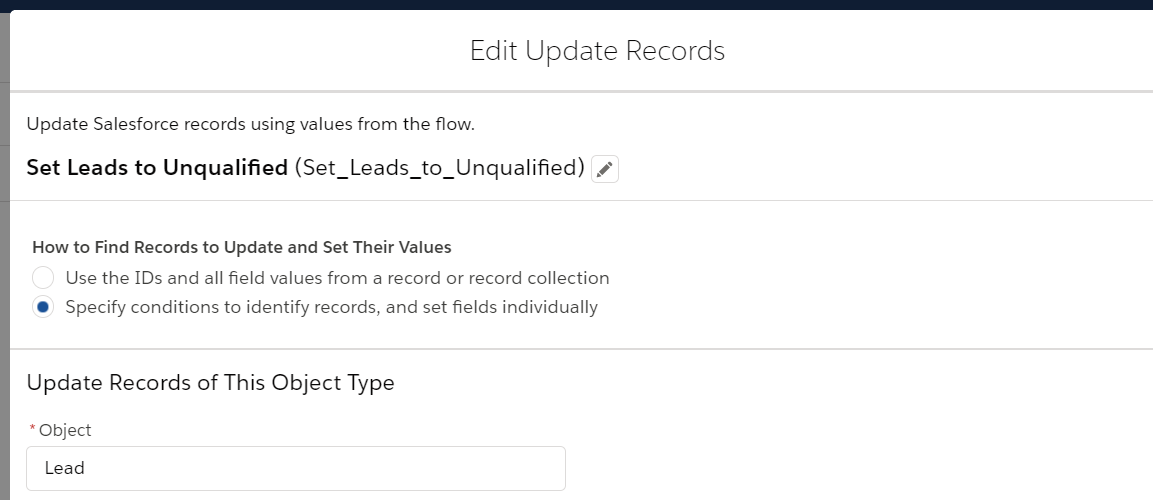
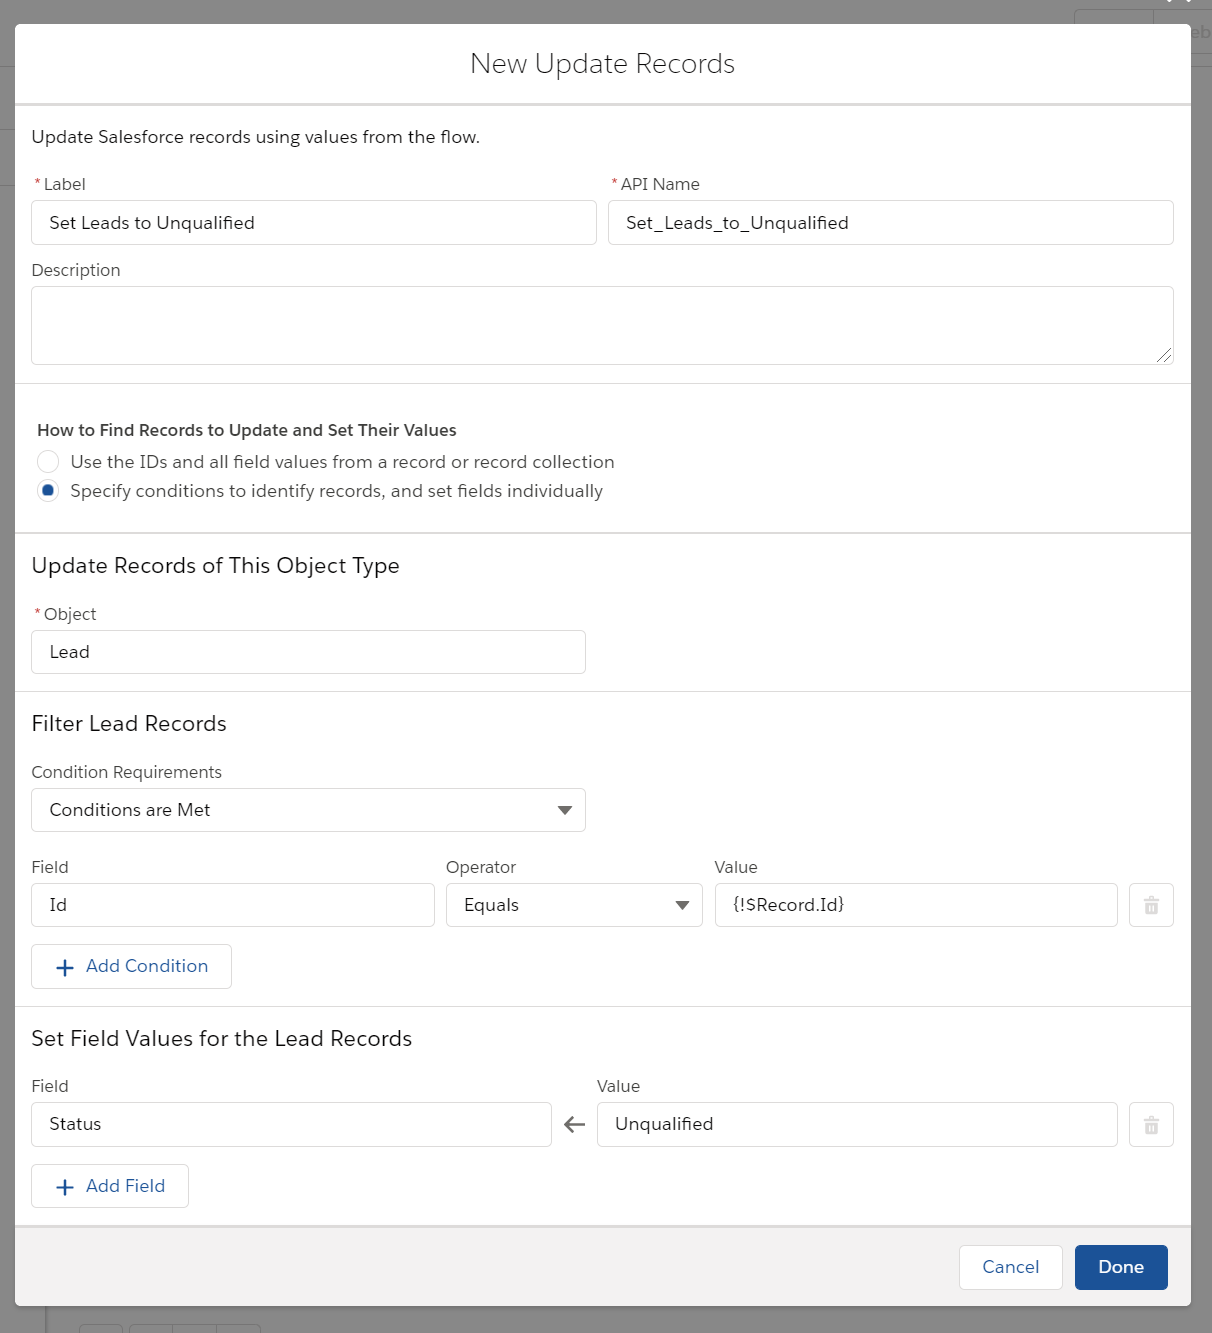
Next, drag an “Update Records” element onto the flow canvas. Select “Specify conditions to identify records, and set fields individually”. Then select Lead as the object.
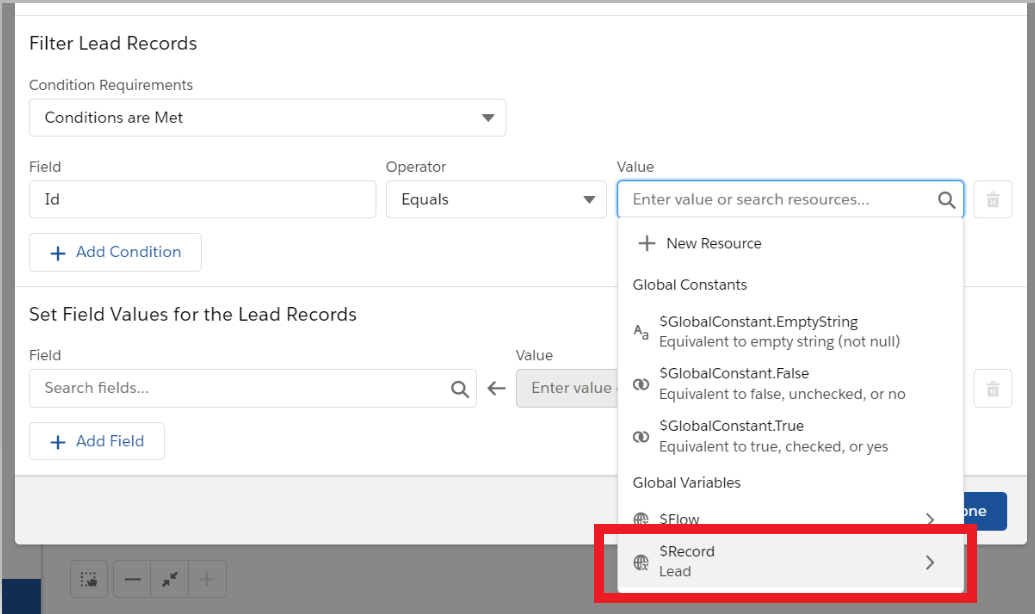
For the Condition Requirements in the “Filter Lead Records” section, chosen when “Conditions Are Met”. Select “Id” as the field, Equals as the Operator, and for the Value select the $Record variable from the list and then choose “Id”.

Lastly, in the “Set Field Values for the Lead Records” section, select the Status field and enter “Unqualified” as its value. Then click Done.
Finally, you are ready to save and activate your scheduled flow. Now your records will be updated in batches at the scheduled time.
Troubleshooting Tip:
Scheduled flows are capable of causing an error stating “UNABLE_TO_LOCK_ROW: unable to obtain exclusive access to this record”, one possible cause of this error is having multiple triggers between child and parent records, such as rollup fields to the parent record or automations that update the parent when the child is updated. If many child records belonging to the same parent record are being updated in your scheduled flow, the constant trigger activation on the parent record can cause this error to be thrown. To resolve this, you may need to restructure your automations, rollups, or custom code for the object in question.


